Vegan Beauty Review

A lil' about me...

My name is Sunny Subramanian and I've been vegan since 2000. I owe it all to my furry felines at home: Towane, Spirulina, Kaduki and Conan. The reason I'm vegan is because I love animals and would never want to contribute to the pain and suffering of any living being. I'm a member of the LA based animal rights group The Vegan Vixens.
I'm trying to help break the stereotype that all vegans are stinky, hairy earth babies. I want the world to know that you can be vegan and still be uber girlie and relish new and exciting beauty products that are vegan, cruelty-free and free of nasty chemicals and preservatives.
If you would like to have your vegan product reviewed on www.veganbeautyreview.com, please e-mail me at sunbundelicious@yahoo.com

See? Vegan beauty products can put a smile on your face too!

Vegan Beauty Review

Loading...

Ingredients to avoid when shopping for cosmetics and skin care:

  • • Animal products
  • • Animal by-products
  • • Animal testing
  • • Parabens
  • • Sulfates
  • • GMOs
  • • Silicones
  • • BHA/BHT
  • • Artificial colors
  • • Artificial fragrances
  • • Propylene glycol
  • • Phthalates
  • • PEG 15
  • • Toluene
  • • Pesticides
  • • Petroleum
  • • Mineral Oil

Look for these Cruelty-Free symbols when buying cosmetics and skin care products.

Look for these Cruelty-Free symbols when buying cosmetics and skin care products.

A few good reasons to go vegan:

• You'll save lives
• You'll live a lot longer
• You'll have more energy
• You'll reduce your risk of cancer
• You'll reduce your risk of heart disease
• You'll have lower blood pressure and cholesterol
• You'll get better nutrition
• You'll lower your chances of getting food poisoning
• You won't be ingesting growth hormones and antibiotics
• You'll get sick less often
• You'll fit into your old jeans
• You'll give your body a spring cleaning
• You'll have healthier skin
• You'll make a strong political statement
• You'll reduce waste and air pollution
• You'll earn good karma points
• You'll save money
• You'll help save the planet

Vegan Links

  • Wikipedia: Vegan
  • The Vegan Vixens
  • Cosmetics Safety Database
  • PETA
  • PETA2
  • Vegan.com
  • Vegan-LA.com
  • SPCA
  • FARM
  • Vegan Action
  • In Defense of Animals
  • GoVeg.com
  • The Humane Society of the US
  • St. Martins Animal Rescue
  • Sea Shepherd
  • Harpseals.org
  • Animal Protection and Rescue League
  • In Defense of Animals

My fellow vegan bloggers

Twitter Updates

Twitter Updates

    follow me on Twitter
    Add to Technorati Favorites
    Beauty  Blogs - BlogCatalog Blog Directory

    Stumble Upon Toolbar

    Famous Animal Friendly Quotes

    "Animals are my friends... and I don't eat my friends."
    ~George Bernard Shaw

    "You put a baby in a crib with an apple and a rabbit. If it eats the rabbit and plays with the apple, I'll buy you a new car."
    ~Harvey Diamond

    "We can judge the heart of a man by his treatment of animals."
    ~Immanuel Kant

    "I am in favor of animal rights as well as human rights. That is the way of a whole human being."
    ~Abraham Lincoln

    "To become vegetarian is to step into the stream which leads to nirvana."
    ~Buddha

    "To consider yourself an environmentalist and still eat meat is like saying you're a philanthropist who doesn't give to charity"
    ~Howard Lyman

    Recipe for Vegan Lip Balm

    Lip balm is surprisingly easy to make using the easiest/quickest/laziest way possible that involves all common household tools.

    What you'll need:
    -lip balm base or waxes+oils+extras
    -essential or flavor oil(s)
    -pipettes (one for each flavor)
    -microwave or double-boiler
    -glass measuring cup with pouring spout
    -spoons or spatulas
    -lip balm tube holder
    -lip balm tubes, jars, pots, lids, bottle caps, etc.---any container that you would like to use for your lip balm
    -shrink bands for sealing containers
    -newspaper or craft paper to cover your counters
    -towels for cleaning up


    The Fastest Way

    Step 1: Preparation
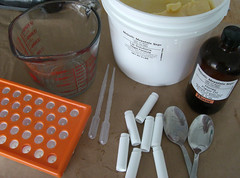
    (a) Buy your supplies.

    (b) Set up all the supplies you'll need on a counter top covered in newsprint or craft paper. You'll be glad you did this because lip balm can be hard to clean up if you make a mess. It's recommended to work in the kitchen as close to the microwave as possible, since you'll be using it a lot, if you're following this method. Be sure you have all your supplies ready, including the containers you'll be pouring into. Once the mixture is melted, you'll need to work quickly, but steadily, so the mixture doesn't harden before it has been poured.

    (c) Put on your favorite apron/lab coat, if you feel so inclined.


    Step 2: Scooping
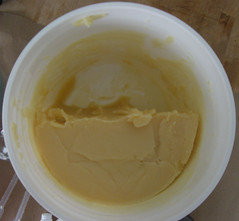
    Scoop out your base into a glass measuring cup that has a spout.


    Step 3: Melting

    Melt the base in the microwave. Take out every 30-45 seconds and stir, so that the base is heated evenly.


    Step 4: Flavoring
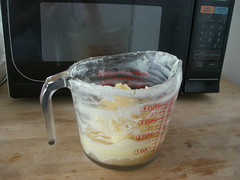
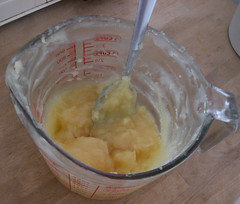
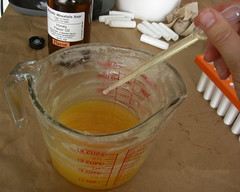
    After the base has melted completely and has cooled very slightly, use a pipette to drop in the appropriate amount of flavor or essential oils. Use a different pipette for each flavor/scent that you use, so as not to cross-contaminate. 2-4% is a good rule-of-thumb for flavor. Essential oils need less, about 0.3-1.5%. The oils you choose may recommend different proportions, so check before you get started. Stir just until mixed.

    It is important that you add your flavor/essential oil after you melt the base. If you add the flavor before you melt the base, it will lose its potentcy in the heating process.


    Step 5: Pouring

    Using the very same measuring cup that you melted the base in, pour your mixed and melted concoction into your tubes or jars or what have you. That's why the spout is so handy. If you're using tubes, fill only to the top of the inside screw. Once the mixture has cooled, finish filling the tube. Pour almost all the way to the top, for that professional and rounded look. This process avoids the risk of cracking that can occur when filling the tube in one go. If you're using jars or lids, just pour all the way to the top in one pour.

    Don't be discouraged if you make a mess when you first start pouring. After a few tries, you'll be a pro. It's all in the wrist.


    Step 6: Labeling
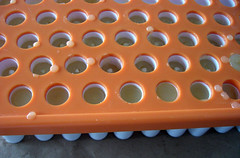
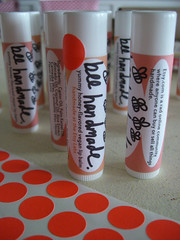
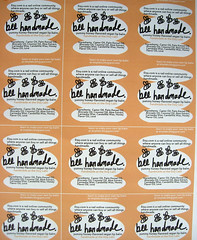
    Make some sweet labels.

    Below are some examples of recycled containers for lip balm.


    Step 7: Sell your lovely lip balm or give it to all your friends!

    Thursday, September 17, 2009

    Oh no! Look what Kanye's done to VBR!

    Newer Post Older Post Home

    Cute Kitten & Cat Videos